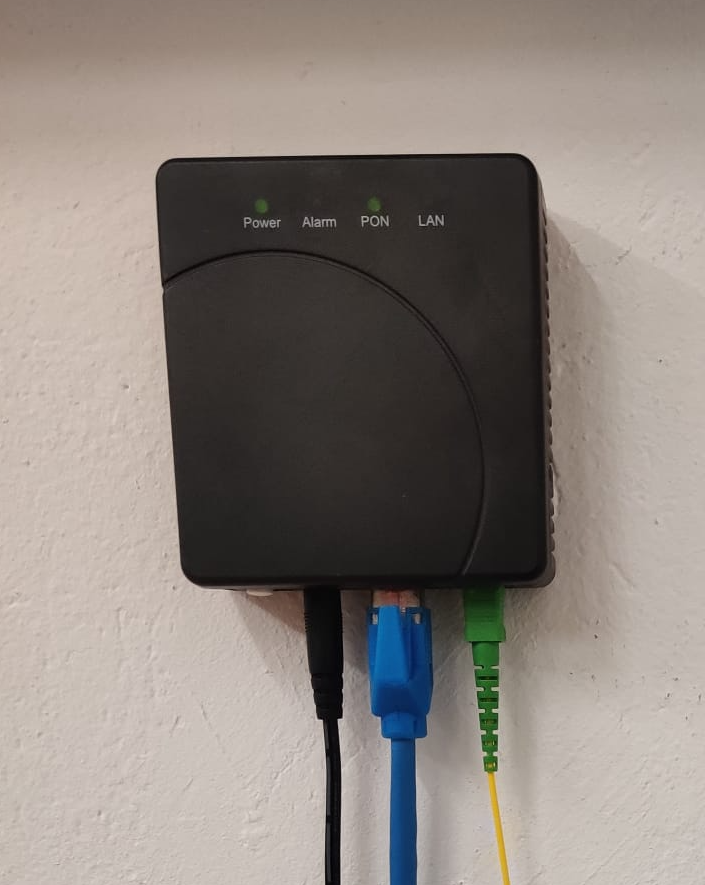
Nokia G-010G-Q
Also sold as: CIG G-97CU
Hardware Specifications
| Vendor/Brand | Nokia |
| Model | G-010G-Q |
| ODM | CIG |
| ODM Product Code | G-97C |
| Chipset | Realtek RTL9601B |
| Flash | 16 MB (Winbond W25Q128JV 3V SPI) |
| RAM | DDR2 325MHz |
| System | Linux (Luna SDK 1.9.0) |
| 2.5GBaseT | No |
| Optics | SC/APC |
| IP address | 192.168.100.1 |
| Web Gui (HTTP) | ✅ Port 80 (⚠️ only available when the PON connection IS NOT estabilished) |
| Web Gui (HTTPS) | ✅ Port 443 NO SSL SUPPORT |
| Web Gui Default Login | user admin password 1234 |
| SSH | |
| Telnet | ✅ user ONTUSER, but has access to GponSLID and not GponCLI |
| Serial | ✅ |
| Serial baud | 115200 |
| Serial encoding | 8-N-1 |
| Form Factor | ONT |
List of software versions
- 3FE49494AOCK21
List of partitions
| dev | size | erasesize | name |
|---|---|---|---|
| mtd0 | 00080000 | 00010000 | “Boot” |
| mtd1 | 00180000 | 00010000 | “Config” |
| mtd2 | 00700000 | 00010000 | “ImageA” |
| mtd3 | 00700000 | 00010000 | “ImageB” |
This ONT seems to support dual boot (notice partitions “ImageA” and “ImageB”), however this has not been tested.
Serial
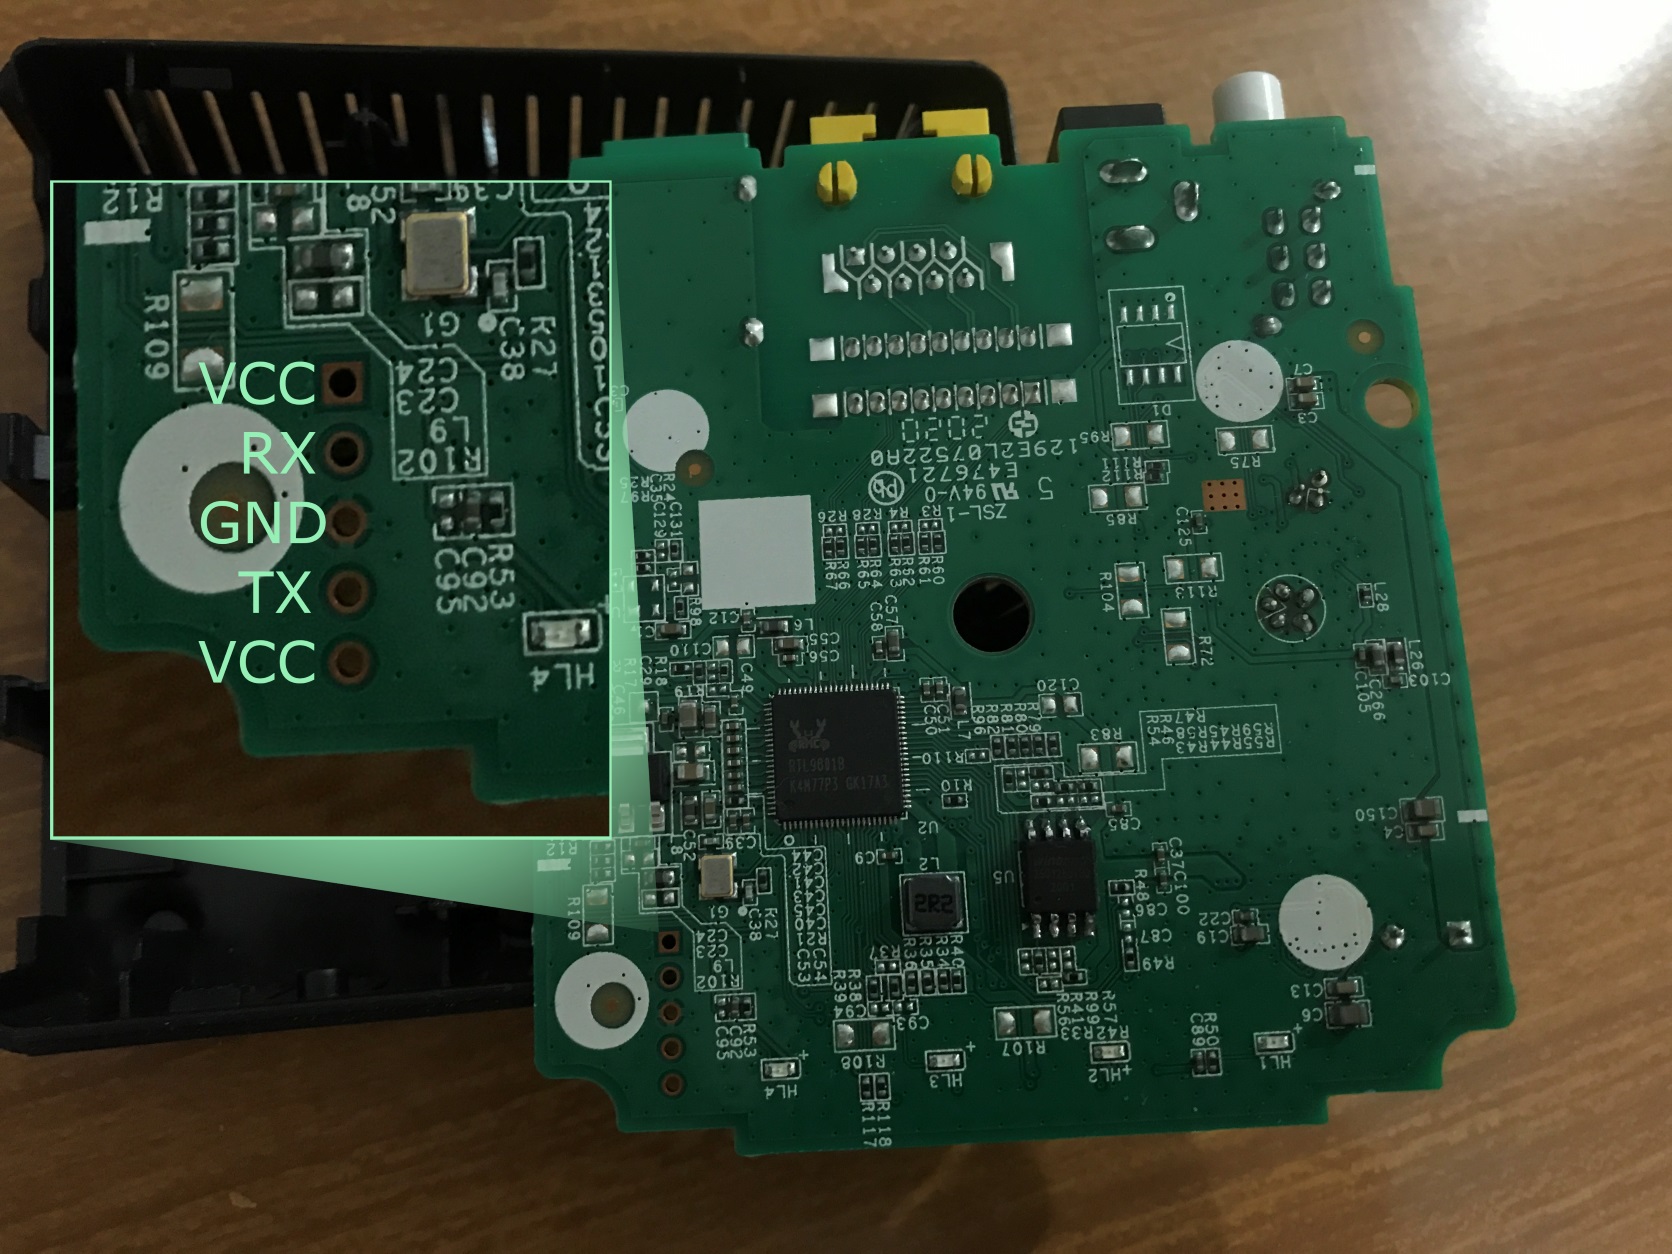
You can easily communicate with the ONT using a TTL converter (for example the CH341A programmer in TTL mode) by connecting the converters’ pins to the ONT following the pinout shown in the image above.
You don’t actually need the two VCC pins, just use TX/RX and GND
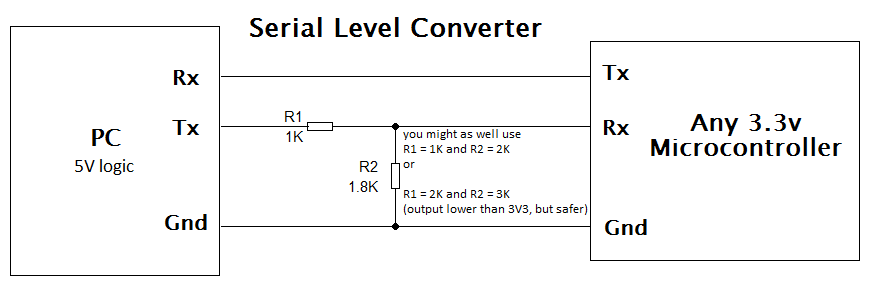
Make sure the logic of your TTL converter is 3V3 too, otherwise you might damage the ONT. To be sure 3V3 is being used, a voltage divider made of 2 resistors between the TX pin and ground as shown in the image below can be used.
Also make sure that your TTL converter RX pin voltage threshold is less than (or equal to) 3V3
Once everything is ok, any TTY client, such as PuTTY, can be used to open the connection with its baud rate set to 115200. At this point, the ONT can be turned on.
A shell-like prompt will be visible:
ONT>
Usage
Login and enable
Once you’re logged in, a custom menu will be shown and you’ll be able to access the linux shell by first typing system followed by shell:
ONT>enable
#ONT>login
User name:ONTUSER
Password: ****
The enable password can be generated using the following form:
Accessing Full Shell
To access a complete linux shell just type:
#ONT>system
#ONT/system>shell
To exit the shell and reach the parent menu type exit or x, in each menu the help command will show how to use the shell
GPON ONU status
Getting the operational status of the ONU
#ONT>traffic
#ONT/system>pon
#ONT/system/pon>show link

 ----------------- LINK STATE -----------------
 Link State:              ACTIVE
 Operation State Machine: OPERATION (O5)
 ----------------- STATE  END -----------------
Querying a particular OMCI ME
#ONT>system
#ONT/system>mib
#ONT/system/mib>show 256
Table Ontg, Ont-g, total 1 instances

EntityID                  = 0x0000
VID                       = "ALCL"
Version                   = AA BB CC DD EE FF 11 22 33 44 55 66 00 00
SerialNum                 = AA BB CC DD EE FF 11 22
TraffMgtOpt               = 0
AtmCCOpt                  = 0
BatteryBack               = 1
AdminState                = 0
OpState                   = 0
OnuSurvivalTime           = 0
Loid                      = ""
Password                  = ""
AuthState                 = 0
OntState                  = 1
GPON/OMCI settings
Committing changes to the OMCI MIB tables for GPON operation
#ONT>system
#ONT/system>mib
#ONT/system/mib>reset
Getting/Setting ONU GPON Serial Number
#ONT>system
#ONT/system>misc
#ONT/system/misc>eqsn set "ALCL00000001"
---ATECMDRESULT--- OK
#ONT/system/misc>eqsn get
eqsn: ALCL00000001
---ATECMDRESULT--- OK
Getting/Setting PLOAM
#ONT>system
#ONT/system>misc
#ONT/system/misc>pon_passwd set "123456789"
---ATECMDRESULT--- OK
#ONT/system/misc>pon_passwd get
pon_passwd: 31323334353637383900
---ATECMDRESULT--- OK
#ONT/system/misc>register_id set "123456789"
---ATECMDRESULT--- OK
#ONT/system/misc>register_id get
pon_passwd: 31323334353637383900
---ATECMDRESULT--- OK
Setting OMCI software version (ME 7)
The following command must be typed into the standard linux shell:
# echo SWVER=3FE49337AOCK80 > /mnt/rwdir/sys.cfg
Getting/Setting OMCI hardware version (ME 256)
#ONT>system
#ONT/system>misc
#ONT/system/misc>eqvid get
eqvid: 3FE45458ABAA06
hex_eqvid: 0x3346453435343538414241413036
---ATECMDRESULT--- OK
#ONT/system/misc>eqvid set "YOUR_CUSTOM_VID"
Getting/Setting OMCI vendor ID (ME 256)
#ONT>system
#ONT/system>misc
#ONT/system/misc>vendor get
vendor: ALCL
---ATECMDRESULT--- OK
#ONT/system/misc>vendor set "ALCL"
---ATECMDRESULT--- OK
Getting/Setting OMCI equipment ID (ME 257)
#ONT>system
#ONT/system>misc
#ONT/system/misc>eqid set "YOUR_CUSTOM_EQUID"
---ATECMDRESULT--- OK
#ONT/system/misc>eqid get
eqid: YOUR_CUSTOM_EQUID
hex_eqid: 0x594F55525F435553544F4D5F4551554944000000000000
---ATECMDRESULT--- OK
Getting/Setting MAC address
mac1 = Lower MAC ID (printed on label)
mac2 = Upper MAC ID (usually = mac1+3)
#ONT>system
#ONT/system>misc
#ONT/system/misc>mac1 get
mac1: aa.bb.12.34.56.78
---ATECMDRESULT--- OK
#ONT/system/misc>mac2 get
mac2: aa.bb.12.34.56.7b
---ATECMDRESULT--- OK
#ONT/system/misc>mac1 set 12:34:56:11:22:33
---ATECMDRESULT--- OK
#ONT/system/misc>mac2 set 12:34:56:11:22:44
---ATECMDRESULT--- OK
Advanced settings
Setting management IP
#ONT>system
#ONT/system>misc
#ONT/system/misc>admin_ip get
admin_ip: 192.168.100.1
---ATECMDRESULT--- OK
#ONT/system/misc>admin_ip set 192.168.1.1
#ONT/system/misc>admin_mask get
admin_mask: 255.255.255.0
---ATECMDRESULT--- OK
#ONT/system/misc>admin_mask set 255.255.255.0
Miscellaneous Links
- MIB file parser for NOKIA’s GPON ONTs (helps you parsing the .mib file located in
/mnt/rwdir)